


Guides8 min read
Lordrush Mystic Trial Guide: Best Formation for Every Zone
How Mystic Trial works in Lordrush, which stats count in each of the six zones, and the troop ratios and heroes to start with in Coliseum, Forest of Life, Crystal Cave, Knowledge Nexus, Molten Fort, and Radiant Spire.
Mystic Trial is Lordrush's weekly PvE challenge. It is made of six zones, each open on set days, and each one only counts a specific part of your account. Nothing you do here wounds your troops or ties up your world-map squads, so it is free progress every day. The most common question is which formation to use where, and the answer changes depending on whether heroes are allowed in that zone. This guide covers both cases.
- Zones
- 6
- Attempts
- 5
- per zone, per day
- Daily reset
- 00:00
- UTC
- Troop losses
- None
The six zones and their schedule
Each zone only applies the stats named in its description. Everything else on your account is ignored there.
| Zone | Open | Stats that count | Heroes |
|---|---|---|---|
| Coliseum | Monday, Tuesday | Heroes, Hero Gear, Hero Exclusive Gear | Yes |
| Forest of Life | Wednesday, Thursday | Pets (Pet Skills are active automatically) | No |
| Crystal Cave | Wednesday, Thursday | Governor Charms | No |
| Knowledge Nexus | Friday, Saturday | Tech and Truegold Tech (Academy and War Academy) | No |
| Molten Fort | Friday, Saturday | Governor Gear | No |
| Radiant Spire | Sunday | Almost everything: heroes, gear, pets, charms, tech, Governor Gear, skins, VIP, and more | Yes |
How Mystic Trial works
- Attempts: you get 5 challenge attempts per zone each day, refreshed at 00:00 UTC.
- Troops: in the first five zones, the Trial Explorers lend you Tier 10 troops of all three types, so your own army size and tier do not matter there. In Radiant Spire you use your own soldiers, with no casualties. If your troops are too few or too low tier, the Explorers top you up to the minimum.
- Raids: clear Stage 1-10 in a zone to unlock Raid. When the zone reopens, you can raid stages you have already cleared to collect their rewards again, then push on to harder ones.
- Quick Challenge: when you are far stronger than a stage, you can skip the fight.
- Stage resets: zones can reset your stage progress when they reopen. You keep your ranking on the Mystic Trial Leaderboard, and you re-clear the old stages for Raid Rewards.
- Rewards: a First Win Reward the first time you clear a stage, and Raid Rewards after that. Expect Misty Crystals for the Trial Shop, Exploration Points, Splendid Trial Chests, Lucky Hero Gear Chests, and Enhancement XP Parts.
What you are fighting
Every enemy squad in every zone uses the same troop mix: about 40% Infantry, 30% Lancers, and 30% Archers. Because the enemy never changes its mix, the right formation is about countering that split, then leaning toward whatever your account is strongest in.
Here is what each of your Tier 10 troop types brings:
| Troop | Strong against | Special trait | Role |
|---|---|---|---|
| Infantry | Lancers (more damage dealt and more defense against them) | Highest Health and Defense | Holds the front line |
| Lancer | Archers (more damage dealt against them) | 20% chance to bypass Infantry and hit Archers directly | Flanks the enemy back line |
| Archer | Infantry (more damage dealt against them) | 10% chance to attack twice | Your main damage |
Put those together and the logic is simple:
- The enemy's largest group is Infantry, and Archers are what beat Infantry. They are also your hardest hitters.
- Enemy Lancers will sometimes skip your front line and dive your Archers. Your Infantry counters Lancers, so a solid Infantry wall protects your damage.
- Lancers are the smallest share you need. They punish the enemy Archers, but they are also the troop the enemy's Infantry counters.
In Radiant Spire you fight with your own soldiers, and below Tier 7 they only carry the counter bonus, not the second trait. The troop types guide covers every counter and which tier unlocks it.
Best troop ratio to start with
- Infantry

- 50%
- Lancer

- 20%
- Archer

- 30%
- Infantry
- 50%
- Lancer
- 10%
- Archer
- 40%
- Infantry
- 60%
- Lancer
- 15%
- Archer
- 25%
These are starting points, not fixed answers. Change one thing at a time, by about 5 to 10 points, and compare how many enemy troops are left in the battle report. If a few ratio changes barely move the result, the stage is a stat check, and your time is better spent upgrading the system that zone counts.
Formation for each zone
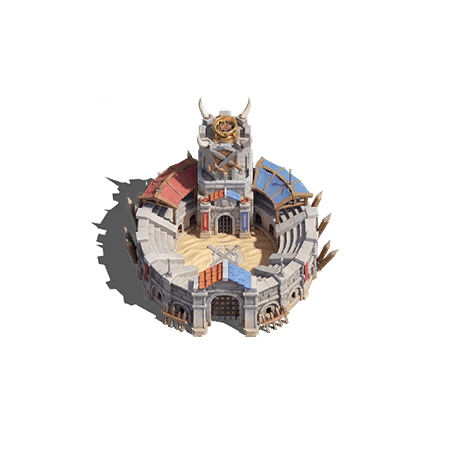
Coliseum (Monday and Tuesday)
Only heroes, Hero Gear, and Hero Exclusive Gear count, so this is a pure test of your hero roster. Start at 50 / 20 / 30 and build your squads around heroes whose Expedition skills boost squads in battle (see the hero section below). Coliseum stages do not get your Governor Gear, charms, or research, so a hero you have starred and geared beats a higher-rarity hero you have not.
Forest of Life (Wednesday and Thursday)
Only pet stats count, and Pet Skills fire on their own. The same skill effect does not stack, so doubling up on the same buff is wasted. Start at 50 / 20 / 30. If you stall, the fix is almost always raising your pets rather than reshuffling troops. See the pet database and the pet calculator.
Crystal Cave (Wednesday and Thursday)
Only Governor Charms count. Each charm slot boosts one troop type:
- Protection Charm: Infantry
- Keenness Charm: Lancer
- Vision Charm: Archer
Start at 50 / 20 / 30, then shift 5 to 10 points toward the type whose charms you have levelled furthest. If your Vision Charms are well ahead, the 50 / 10 / 40 Archer push is the natural next try. Plan upgrades with the Governor Charm calculator.
Knowledge Nexus (Friday and Saturday)
Only Tech and Truegold Tech from the Academy and War Academy count. Most combat research boosts one troop type at a time (alongside squad-wide stats), so lean toward the type you have researched most. This is also the one hero-free zone where the Explorers can lend you soldiers above Tier 10, once you have unlocked them. Start at 50 / 20 / 30. Check what is left to research in the research database.
Molten Fort (Friday and Saturday)
Only Governor Gear counts. Each troop type has two gear slots:
- Cloak and Pants: Infantry
- Head and Necklace: Lancer
- Ring and Weapon: Archer
Start at 50 / 20 / 30 and tilt toward the type whose two pieces are strongest. If you keep losing your front line here, try the 60 / 15 / 25 heavy wall before anything else. See the Governor Gear calculator.
Radiant Spire (Sunday)
The one zone where your whole account counts: heroes, all gear, pets, charms, tech, Governor Gear, skins, VIP, buildings, and more. It is also the only zone that uses your own troops, so your troop tier matters here. Temporary bonus items, King and position perks, Empire skills, alliance bonuses, and outpost bonuses do not apply.
Start at 50 / 20 / 30, and use the same hero and squad advice as the Coliseum. Because it uses everything, Radiant Spire shows which of your systems is lagging, so it is worth looking at which zone you stall earliest in during the week.
Heroes for the Coliseum and Radiant Spire
Mystic Trial battles are squad battles, so your heroes' Expedition skills are the ones that work here. Conquest skills do not. That flips some common picks: a hero with strong Conquest skills but economy Expedition skills does very little in Mystic Trial.
Each squad takes three heroes. Look for Expedition skills that raise Attack, Lethality, Health, or damage dealt, or that cut the damage your squads take. Some good examples from the early roster:


 Mythic
  Infantry Gen 1
 Mythic
  Lancer Gen 1
 Mythic
  Archer Gen 1
 Mythic Infantry Gen 1
- Sebastian, Valky, and Isabelle each carry three combat Expedition skills, so they are strong in any squad. Porter has two (Defense and Lethality) plus a construction skill.
- Bane (less damage taken, lower enemy Attack), Flint (Health and Attack), Rita (Lethality and less damage taken), and Cyprus (less damage taken and a chance for bonus damage) are solid Epic picks with two combat skills each.
- Miko, Hyeri, and Azad each have one combat skill and one non-combat skill. They still help, but less.
- Rogers, Ogg, Herm, and Sylvie only have gathering and production Expedition skills, so they add little here beyond their stats.
Compare full kits in the hero database, or check two heroes side by side with the hero comparison tool.
Squad unlocks and the difficulty walls
In the Coliseum and Radiant Spire, you start with one squad and unlock more as you climb:
- Squad 2: clear Stage 5-10
- Squad 3: clear Stage 25-10
The enemy grows the same way. From Stage 6-1 the enemy brings two squads, and from Stage 26-1 it brings three, each led by its own heroes. The recommended power roughly doubles between 5-10 and 6-1, and jumps by about half again between 25-10 and 26-1. If you hit a wall right after unlocking a squad, this is why. Your new squad needs heroes and troops of its own before you can push on.
Tips for getting unstuck
- Use all 5 attempts every day. Each zone is only open on its own days, so unused attempts are gone.
- Clear Stage 1-10 everywhere. It unlocks Raid, which pays out every week for stages you have already beaten.
- Retry a close loss once before changing anything. Skills that trigger on a chance can swing a near miss.
- Change one variable at a time and compare the enemy troops left in the battle report.
- Front line falls first? Add Infantry. Enemy survives to the end? Add Archers.
- Ratio changes do nothing? Upgrade the system that zone counts. That is the real gate.
- Prepare for Sunday. Radiant Spire uses everything, so the zone you struggle in during the week is the system to upgrade before the weekend.